
Related articles
Track your own money with Borderless Budget
Every account stays in its own currency, and every total adds up in yours. The first 30 days are free.
Get startedA tour of the Transactions page: the summary, search and filters, the list, swipes on a phone, the detail sheet, selecting rows, and keyboard shortcuts.
Every account stays in its own currency, and every total adds up in yours. The first 30 days are free.
Get startedThe Transactions page lists every transaction across your connected and manual accounts. The line under the title tells you what you are looking at: how many transactions you have, or how many match your filters, and how many are waiting for a quick look.
Three figures sit under the title: Money in, Money out, and Net, for whatever the list currently shows. Money in carries a plus sign, money out a minus sign, and Net is what is left. Change the period or a filter and all three follow.

On a computer, the period sits beside the title, and the row under the summary holds the search field, Filters, More actions and Add. Typing in search narrows the list as you type. The period narrows it to a week, month, quarter, year, custom dates or all time.
Filters opens the filter sheet: category, currency, merchant, review status, account and whether a transaction has a note. Changes apply to the list behind it as you make them. The number on the button counts the filters you have on; the period is not counted. Every active filter shows as a chip under the row. Remove one with its X, or everything with Clear all.
If nothing matches, the page says so and names the combination, for example "Nothing in September 2026 is both Housing and paid in British Pound", with a Clear filters button.
More actions holds Import and the export formats, CSV (Transactions) and JSON (Transactions + Categories). The export follows your filters.
On a phone, the title row holds a round check button, which starts selecting, and the plus button. The plus button opens Add or import, with Add transaction, Import CSV and Export. Under the title sit the search field and a square Filters button.
While no filter is on, a row of quick chips sits under the search: the period, Not reviewed with its count, Account and Category. The period chip opens the period choices, Not reviewed shows only what still needs a look, and Account and Category open the filter sheet at that section. Once a filter is on, the period chip stays first, and the filter's chips and Clear all follow it, so you can still change the period.
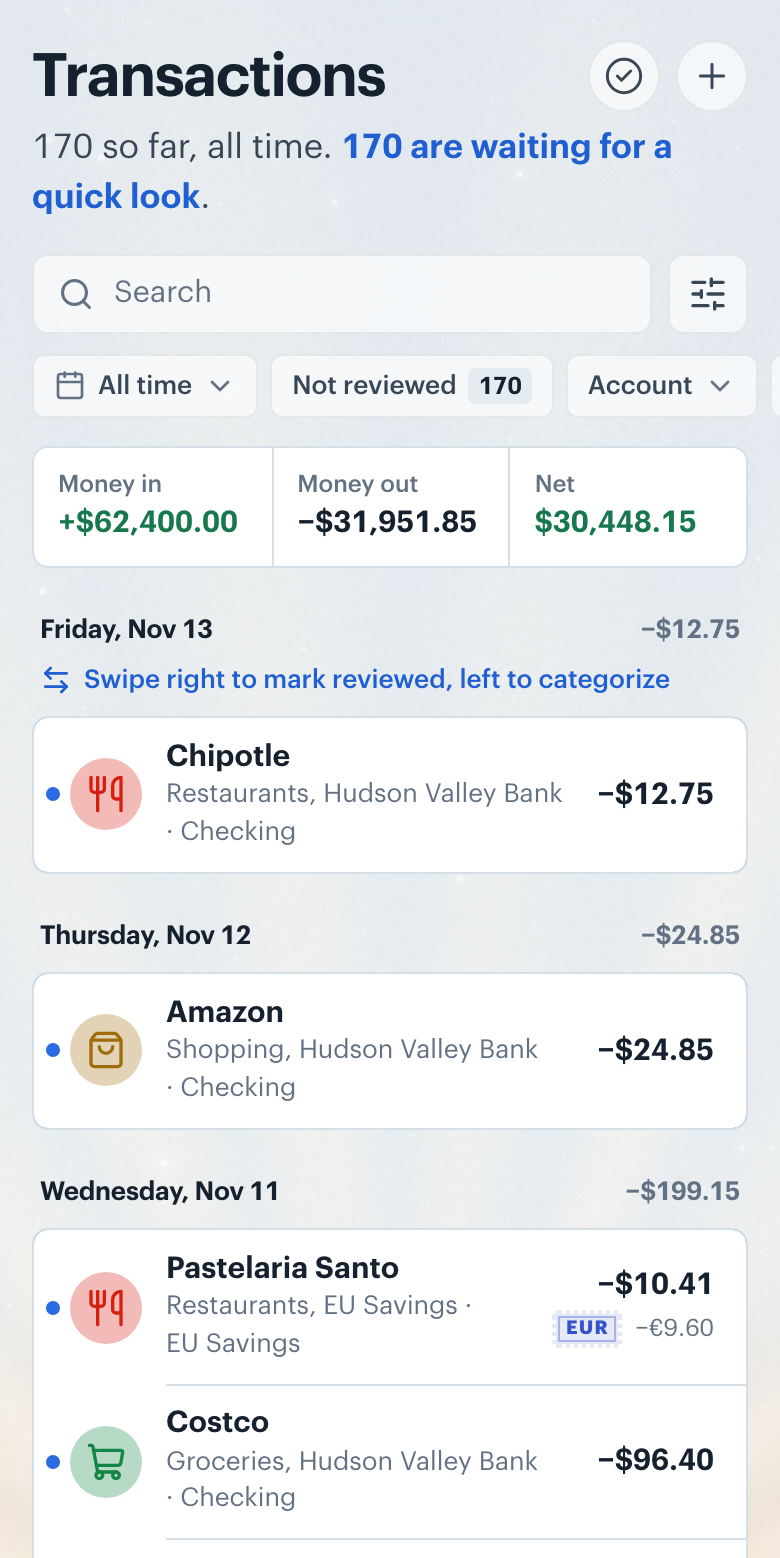

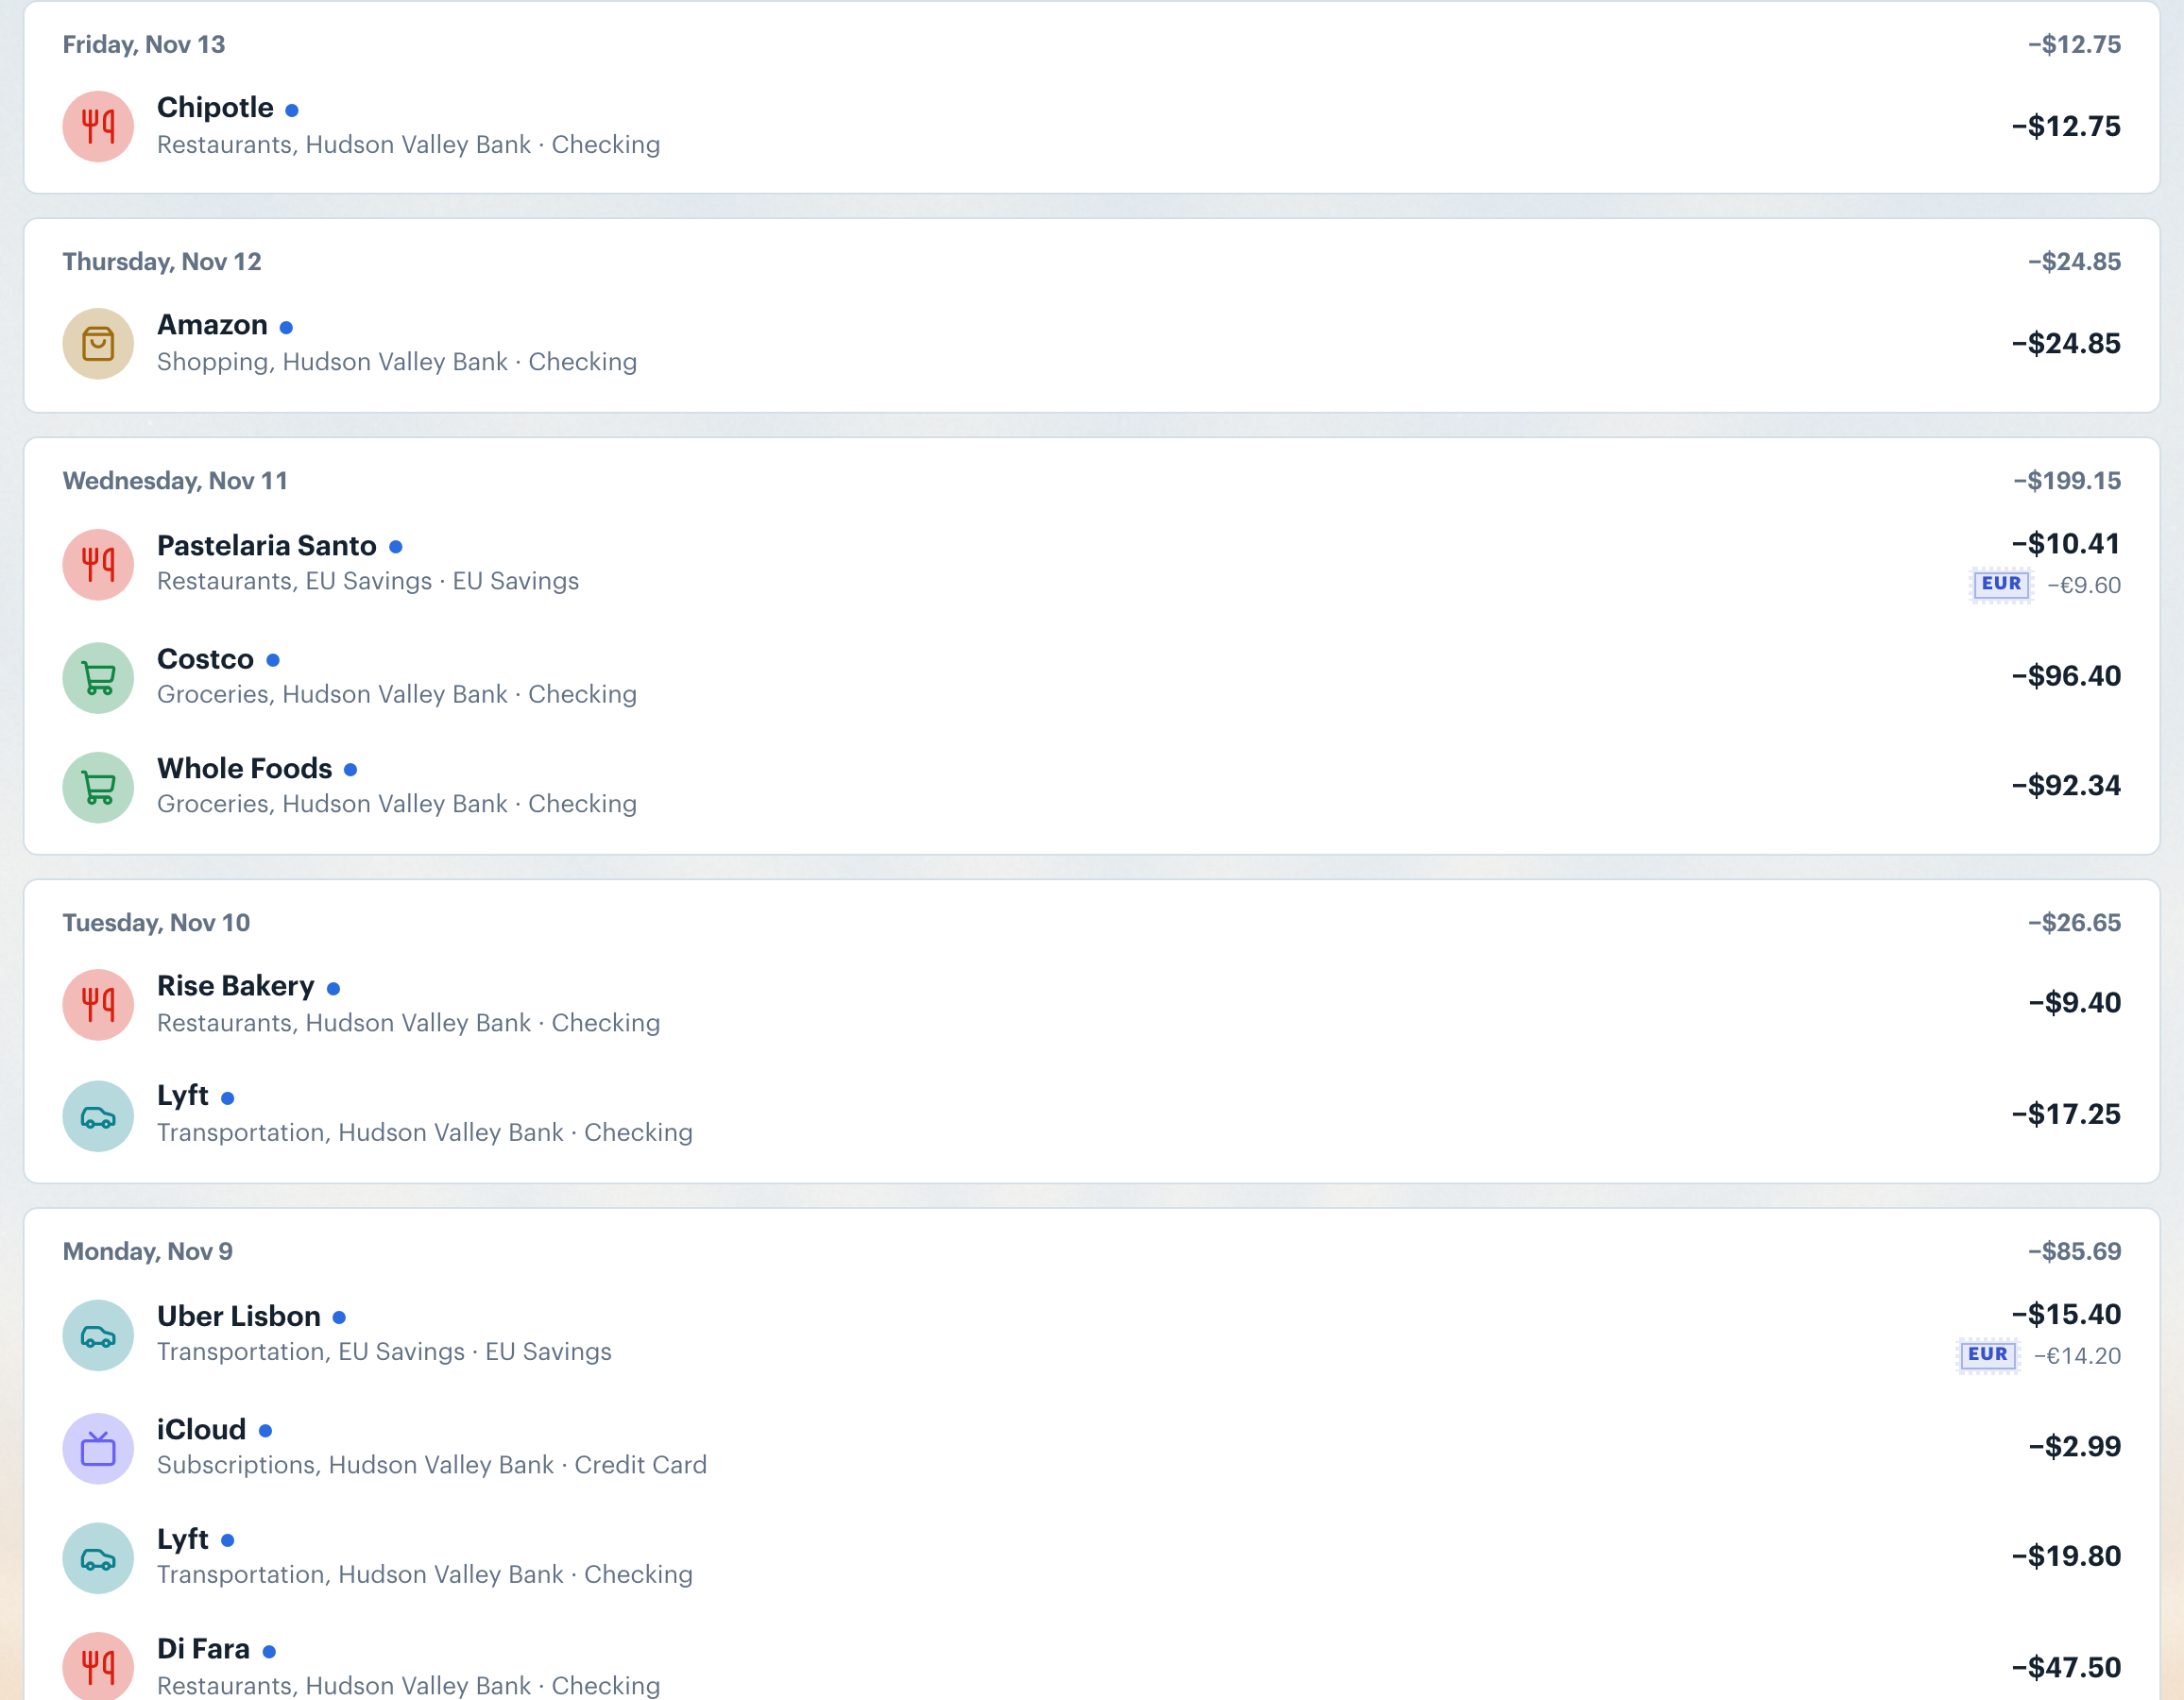
Transactions are grouped by day, newest first. Each day's heading shows the date and the day's net. A row shows the category, the merchant, the category and account underneath, and the amount in your home currency. A transaction in another currency adds its currency and original amount under the home amount. A small dot means it is waiting for review: after the merchant on a computer, at the row's left edge on a phone.
On a computer, click the category under a merchant to change it right there. On a phone, swipe a row right to mark it reviewed, and Undo in the message that follows puts it back. Swipe a row left to pick its category. The first time you open the list, a line above the rows reminds you of both swipes. The list loads more as you scroll.
Want to change a transaction's category? See Categorizing Transactions.
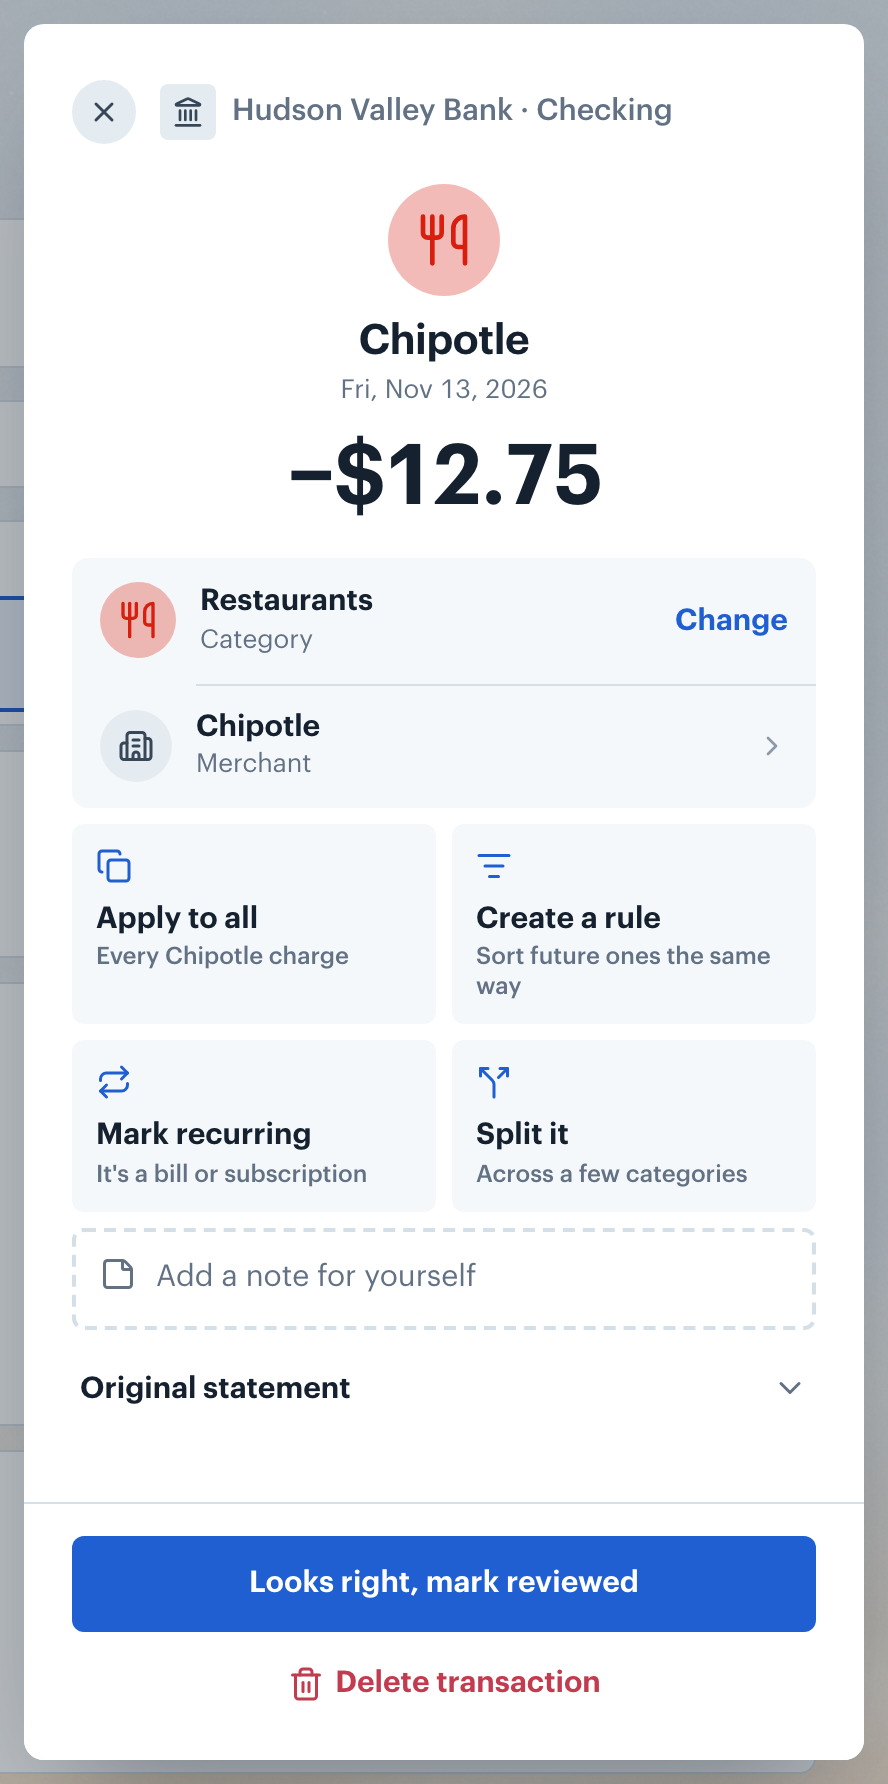
Click a transaction to open its details in a sheet over the page; on a phone it slides up from the bottom. The sheet shows the merchant, the date and the amount, then the Category and Merchant rows, the actions that apply (Apply to all, a rule, Mark recurring, Split it), a note, and the original statement. Tap Change on the category row to pick another one.
At the foot, Looks right, mark reviewed marks it reviewed, with Undo in the message that follows. Delete transaction sits under it and asks before it removes anything. Close the sheet with the X, by clicking outside it, or with Esc.
Want another member to look at it, or to send a reviewed one back? See Asking Someone to Review a Transaction.
On a computer, hover a row and its category icon turns into a checkbox; once one row is selected, every row shows one. Shift-click to select everything between two rows. On a phone, tap the round check button beside the title, or press and hold a row. The title row then holds Select all shown and Done.
A bar appears at the bottom with the number selected and Categorize, Mark reviewed and Delete. Marking several reviewed offers Undo. Delete asks before it removes anything.
Want to export a filtered set of transactions? See Exporting Your Transactions.

On a computer, j and k (or the arrow keys) move through the list, Enter opens the highlighted transaction, x selects it, / jumps to search and Esc closes the sheet, then clears the selection. n adds a transaction. c categorizes, e marks reviewed (or, when everything it acts on is already reviewed, not reviewed) and Delete deletes, each acting on the selected rows or, with none selected, the highlighted one; Delete always asks first. [ and ] step to the previous or next period. g then a page's first letter goes there from anywhere, like g b for Budgets. On any other page / opens search, and ⌘K (Ctrl+K on Windows) opens it from anywhere. Search finds merchants, categories, accounts, recurring charges, transactions and help articles, and runs any command. Hold Shift to see each key on the button or row it works on, and press ? to see every shortcut.
👋 Still have questions? Email [email protected].